Airbrushing a wave can be a frustrating process. How do you get the delicious complex texture of the water with just an airbrush and paint? It can take a long time to paint the details of the foam and shade each one. Is there a quicker way that is also more fun?
I’ve never been one to spend a long time on something that wasn’t fun..so I modified the techniques of spray paint art to paint the ultimate hybrid spray paint/airbrush wave. Here’s how I did it.
This is what I started with..just airbrushing a little color on the page where the wave is and where the sky is. (notice I’m using a single action super cheap airbrush…you don’t need expensive materials to do this kind of airbrush art)

I’ve used unusual tools to paint the wave so far. After laying down some basic colors, I used newspaper to create an even curl that looks like it took a long time (but only took a few seconds) Dragging the paint around with newspaper is done all the time in spray paint art, but usually when doing airbrush art, there is not enough paint used to do this. But I get around this by adding lots of Windex to my paint to keep it juicy and applying more paint than usual. It’s no problem to use unusual materials and not worry about hurting my airbrush, because my airbrush only cost $11. I also never have to clean it out. This one is just a cheap throw-away, but it does the trick and I can always add a nicer airbrush for detail if I want to later. I know most of you don’t do airbrushing like this, but I’m used to spray paint art…so I like the more industrial style spray like airbrush. It’s just more good stuff you can play with!
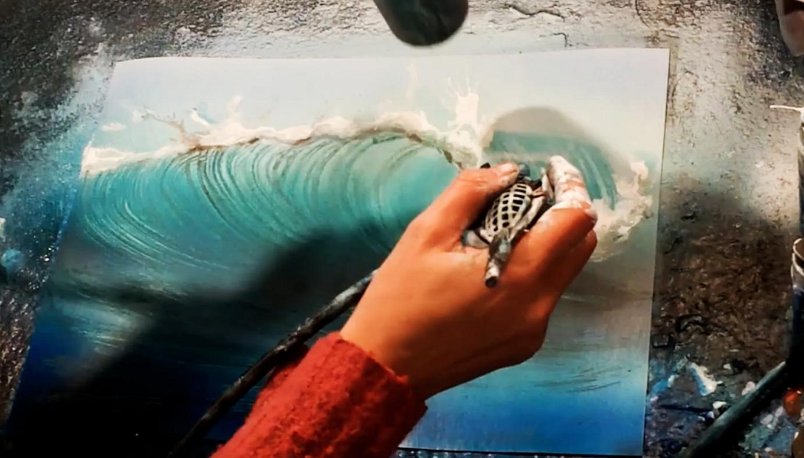
Once I’ve dragged the paint with my newspaper to create the curling parts of the wave, I’ll do the foam. Notice I’m blowing the foam with my airbrush, and this automatically creates foamy looking spray with delicate Lacey textures! It’s just fun and hardly any work! Notice the tip of my hairdryer (or heat gun) at the top, drying the foamy shapes that I like and making sure they stay exactly as I decide.
Here is what my wave looks like when it’s finished. I think it’s more complex looking than your traditional airbrush wave. It only took me about 10 minutes to create! And I had major fun blowing the paint around with just air.

Here are some other examples of hybrid spray paint art/airbrush art waves for your enjoyment and curiosity.
Notice the foamy texture in front of the wave here. Those are spray paint art techniques modified for airbrushing. All of the paintings I’m showing you here took under 20 minutes to do.
If you like to work really loose, you can create delicate foamy textures when you mix your paints really wet and blow the paint around using just air.
Then you can use transparent colors to tint different parts of the foam to add interest.

Here is a tighter design with the focus on the movement of the water in front of the wave. I dragged the paint with my newspaper to create the flowing texture in just one stroke.

I hope you’ve enjoyed this brief tour of airbrush art/spray paint art techniques.
